You might have seen this tutorial floating around blogland - how to have gorgeous no-heat curls. Had to pin this one and try it. Then somewhere along the lines I watched this youtube video of another technique. Decided I must try both! :) And here just for you I'll show you both and how they turned out.

Beware lots of pictures coming up - of me and definitely NOT looking my best! But all in the name of beauty (and blogging). :)

Okay, so you start with slightly damp hair.

I'm not going into details because Simply Cadence did an amazing job explaining what you need to do. :)

Here I am after putting my hair up in a high ponytail and (doing my best) rolling it up in the sock. 


Here's a top view.  Notice how I have pieces of hair sticking out of my bun?  I think it's becuase my hair is really just a bit too short for this technique.  But off to bed I go...
And here I am in the a.m.  I wouldn't really call it "curly" but maybe just wavy.  Again, I think it is because my hair is too short to really roll up in the sock.

Okay, so on to the next technique.   Go watch the YouTube video to get the full directions.  Did ya watch it???  Once I watched it I decided right away to tweak it a bit.  If you notice her curls are only on the bottom part of her hair and I wanted curls all over so I thought I'd try to add a second elastic headband on the top part of my hair.  Hard to explain, easy to understand from the pictures...
Again, you start with slightly damp hair and I seperated my hair into two sections.  I'm not sure why I look like a deer in headlights here???

Here is the bottom part all wrapped up.

And here's both sections wrapped up.
So in the front I had to clip the two elastic bands together because the top one had a tendency to slip off.  This wasn't a big deal since I knew I wasn't going to be sleeping flat on my face. :)
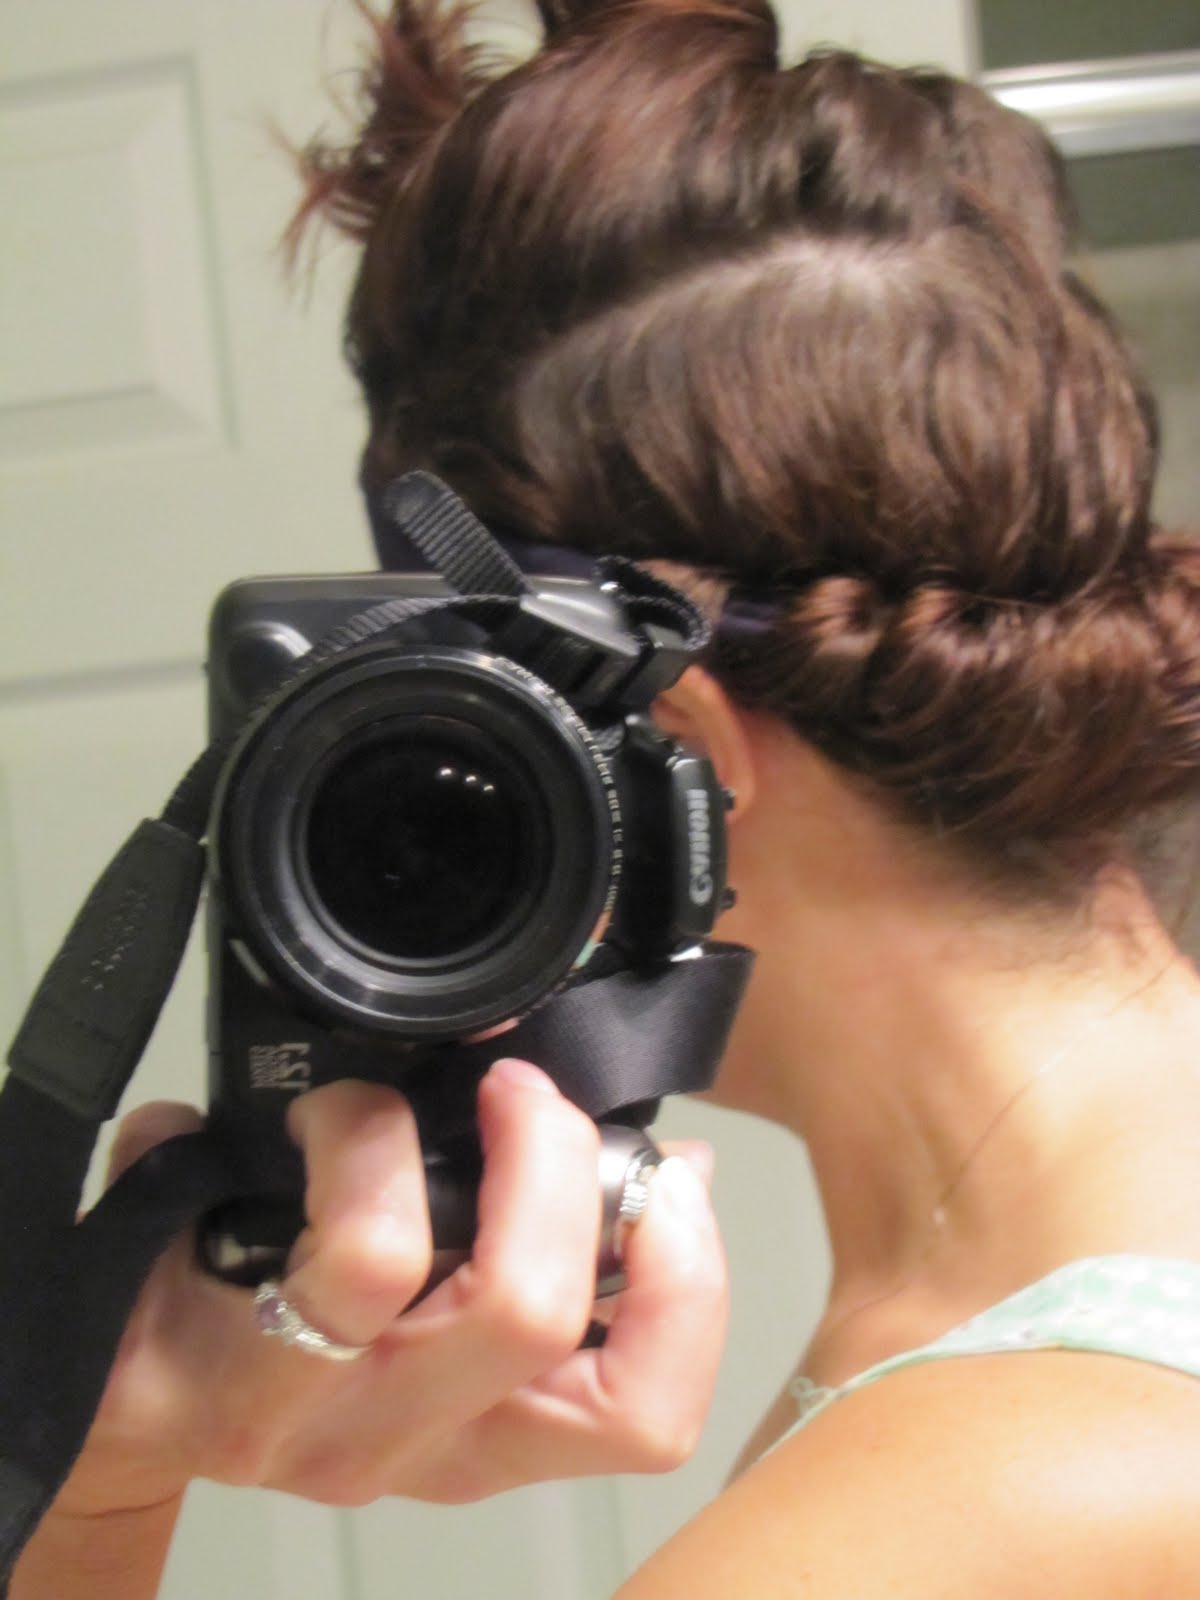
Here is is as soon as I took the elastic bands out.  Pretty curly huh?!?!?
Back view.
And here I am all ready to go.
Are you loving the whining little girl in the background??? :)
Whatda ya think?
 
 
So there you are.  Have you tried these techniques yet?  Share a link to your picture so we can see how your curls turned out! :)
 

Faux Ice Cream Sandwiches


I came across this recipe in the newspaper yesterday and sounded like a perfect treat for my kids (and who are we kidding - ME TOO)!! :)

And they are SOOOO easy.  I don't have the newspaper anymore but I want to say that it came from Southern Home.  I could be way off here so if it's from somewhere else please don't get offended and hate me!

Okay, here's the recipe:

1 box graham crackers
1 8 oz. tub of whipped cream (fat free, lite or regular)
1 large box of instant chocolate pudding - I bought the sugar free one but whatever you like will work.
Sprinkles (guess you could leave this off but what fun would that be????)

Mix up the pudding per the boxes directions.  Once it's all mixed up add the tub of Cool-Whip and mix well.  Now at this point I put the whole bowl in the refrigerator for about 15 minutes just to harden it up a bit. 

Break your graham crackers in half, put a big spoon full of "ice cream" and top with another graham cracker.  Roll the side in sprinkles and your DONE!!!  See how easy that is!

Put these goodies in the freezer and in about an hour they will be ready.  These are so yummy!!  Even the hubby thought they were good and he typically only likes the full fat full sugar version of anything. 

Definate success and it makes a TON - used the entire box of graham crackers.  Now you've got dessert lined up for a week!  Or if your house is like my house they'll be gone in a couple of days! :0)

Happy Snacking!!!


I have so many projects that once I get done I think it's my favorite - gonna add this one to the list! :)

Back at the beginning of May I went garage sale shopping and came across this shower curtain....

Now I didn't need a shower curtain but I am sucker for some Madras so I bought it.  I got a whole box of stuff for $10 so I'm guessing I paid $2 for this.

It had been sitting around for a while waiting for the perfect project and when I was looking for fabric for my son's nap mat for kindergarten it hit me... THE SHOWER CURTAIN! :)  I love when something just hits you like a ton of bricks! :)

Unfortunately, I didn't have my camera with me during construction (stupid I know) so I can only tell you what I did.

So, I started my whole pattern around the grommets at the top.  I loved the industrial look of them and knew as soon as I was starting this project that I was going to use these as the closing point for the mat.  Originally I was thinking of ribbon going through them to tie, but knowing that this was for a kindergarten boy I had to simplify.

 I bought a strip of velco for $.99 at JoAnn's. Didn't like having to look at velco so I covered it with left over fabric!!! GENIUS! Okay, maybe not genius but at least clever, right?

So now all he has to do is roll it up and loop the velcro through to attach it.

Now the nice thing abour constructing this out of a shower curtain is that it already has nice seams and even a lining! :)

Once I got everything measured and laid out the way I wanted it I laid a couple of pieces of batting down and stitched around each box - so that when I wash it the batting dosen't seperate.  Now it has little square pockets of fluff! :0)

Cute huh?  I even had enough fabric to make a "cover" for him.  And I didn't have to do any of the hem here - it came like that and had that cream fabric backing.


And to make the pillow I just sewed off the top part and stuffed it.  Easy peasy!

Oh yeah, and I monogrammed his name on it first thing so that the back of the monogram would be hidden in the inside.

I can't wait to see him "try it on" :)

Linked up to:

Todays Creative Blog

My weekly Facebook special

So each week I like to feature a product to offer just to my facebook friends.  Last week it was the "Bama Baby" A-line dress and as promised I chose something this week that was football related! :)

I made this adorable halter top style dress out of two coordinating Michael Miller fabrics and love how it turned out. 


If you arn't friends with me on Facebook please get over there and show some LOVE! :)

So far I've just been doing little girls clothes but what else would you like to see????  Was thinking of featuring an E-reader cover next week - that might appeal to more people.  And of course I could do some home decor but if you don't live in the area, not sure what shipping would be on that! YIKES!!

I miss my computer!!! :(

I mentioned in my last post about my rocking chair make-over that my computer got a nasty nasty virus and completely shut down! :(  My dad the computer genius that he is installed Windows 7 on it - so it's like a brand new computer!  YAY!  But he's had it for a week working on retrieving my pictures.  Yay for pictures BOOO for a long time without my computer! Finally got everything but he is spending today cleaning it up!  ONE MORE DAY!  The only computer access I've had is when I'm at Savvy Gifts (work) and that isn't everyday - so I haven't been able to search my favorite blogs!!! BOOOO... I miss browsing and finding great ideas and reading everyone's stories! 

Can't wait to be back into the swing of things.  Will probably spend all weekend in front of the computer catching up! :)
You might remember when I had a post about this rocking chair that I picked up off the side of the road (yes, my favorite way to get furniture) :)


Wow, just realized that I picked this up 8 weeks ago.  I definitely had it sitting around in my garage for awhile! 

I knew as soon as I saw it that I wanted to paint it a bright color and put some fun fabric on it. 
Now at this point I would normally show you some progress pictures but my computer crashed and died last week and I lost EVERYTHING! :(  But basically I cut all the cane off of the chair (I saved the "back" piece by the way because it was in good shape and I know that I can use it later for something). 

The chair was taken apart, primed and painted.  Sanding in between each coat.  A slight distressing at the end and finishing up with a coat of finishing wax.  Much more work and more time consuming than I originally expected, but arn't they all?!?! :)  Again, had pictures of the chair in this beautiful stage but that nasty virus took them all away! :(

My brother came back into town and if you remember from my curbside junk dresser turned amazing entertainment center he is essential in my makeovers! :) He used his router (I think) to cut a groove in all of the pieces and cut pieces of plywood to fit.  I covered the boards in a piece of fleece (so you wouldn't directly feel the board) and then covered with fabric, wrapped around and stapled.  See.....

Once that was done I stapled fabric to the front and stuffed it with stuffing - which by the way, if you do any upholstering (or want to) you know or will find out that "stuffing" is unbelievably expensive!!!  I really didn't want to spend that much so I looked for cheaper alternatives.  While at Kohl's I found big pillows on sale for $4.50 and then had a 20% off coupon, spending about $7.50 on both.  I ended up using 1 1/2 of the pillows.  Still have enough stuffing to make a couple of throw pillows!


I wanted to hide the staples as well as the wood frame (it was in pretty bad shape with the removing of the cane) so I decided to make a double piping to go around each piece.  I could go into details but there are some good tutorials out there on this.

To finish up I got out my trusty hot glue gun and glued the piping around the edge and re-attached the seats!

And here she is in all her glory!


Here's the breakdown of my costs:

Chair - FREE! :)
Fabric - $10 - Got a GREAT deal on this!
Stuffing - $7.50
Cord - $3.50
Paint - $15.00 - The biggest expense! Paint ain't cheap ya know????

That's $36 on supplies alone!

Now how to put a price on all my labor and love?????

Facebook specials!

Do you "like" L.Lane Designs on Facebook???? If not, go like me! :) PUHHHLLEEZZZEEE! :) I have started offering specials only through my Facebook page. Today I listed a "Bama Girl" A-line dress


- if you're not in Alabama or not a Bama fan, no worries, I'll have other things listed soon! :) Thanks so much!!!!

Last day to enter giveaway....

Do you remember last week when I told you guys about the giveaway for these super fun tumblers?


Don't you just LOVE them! :) Well today is the last day to enter. Get on over to Savvy Gift Blog and enter before 5:00 p.m. (CST)!!
So if you're like my family you don't go anywhere or do anything terribly exciting on the 4th of July. Just a long weekend, full of family time, hanging at the pool, grilling out and fireworks! :) Sounds like a jam packed three days, but there's always time to do a little creating!!

What are you working on?

Me? Well, my brother's back in town. Remember the last time he was here his skills were essential in transforming curb side junk into my gorgeous entertainment center!

So I had to have a project ready when he got here. I'm close to being finished. Probably will finish up today, so I'll have it to post soon. But here's the sneak peak on the before.


Found this beauty on the curb a LONG time ago. Here's the original post.

I'm excited to show you the transformation! Now to leave you hangin...... :)