I pinned this wonderful looking smoothie last week sometime with the intention of making it on 4th of July
but ya know, I had watermelon in the fridge and really don't you think I needed to taste test it out before making it for the whole fam????? :)

Check out the recipe here.

And now for mine. I followed the recipe for the first batch (except that I only had table syrup instead of maple syrup) and I found that it was too syrup tasting for me. Probably would have been different if I used real maple syrup but hey you gotta use whacha got!

The second batch I put no water and a handful of ice cubes and some sugar (didn't measure this part just eyeballed what looked good). :)

It was okay. The next batch (and no I didn't drink all of these - they were handed out to the kiddos) had the tequila! :) Helllooooo Mama. This is where it's at! Tasted much better!!
Actually I'm drinking right now as I post. :)

Here's mine.

Okay so not garnished as beautifully but it looks like the original, right? :)

Has anyone tried this yet? Or are you planning on it.
So back in March I bought 9 yards of some upholstery fabric (I was going to cover a chair and ottoman but decided against it) - well really I decided I didn't like it, it was too dark. Wish I had a picture to show you but nope...

Anyway, JoAnn's policy is no returns after 90 days. Now on seasonal items I completely understand this. If you buy a spring item and try to return it in the fall, then of course they can't re-sell it. But upholstery fabric - it has no season - you can re-sell it anytime.

So I thought I would give it a go. After all it was $60 in fabric that I wasn't going to use (yeah, I got it on clearance). Well after the sales clerk couldn't get the register to work, the manager came over and basically said Nope, can't take it back. Here's your fabric, have a nice day. I said, really? I can't just get a store credit? God knows I would use it! But he said that there was NO WAY to over ride the system. Really??? There's always a way.

So I got to work and immediately emailed the company to explain that I thought it was ridiculous not to take it back just because I was a teeny weeny past the ninety days and all I wanted was store credit.

And wha-la I got an email from the store saying that they would gladly accept the fabric back. Yep, I thought so.

Just in case you thought I might have sent one of those nasty emails about how everyone was rude and I should not only get my money back but shop for free for a year - thats not me! It was a very nice email just stating my case! :)

So I got a $60 credit and of course already spent some of it - so thumbs up to JoAnn's for taking my fabric back - I'll definitely keep shopping!!

Tumblers Giveaway!


Thought I'd pass along this giveaway. In case you didn't know, which you probably wouldn't because I don't talk about it, but this is from my retail store. I own a small gift boutique and I started a blog for that just to update people on products and fun stuff (like giveaways) :)

Check out the blog Savvy Gifts Inc. All you have to do is follow and leave a comment letting us know which one you like! :) Easy as that.


So I had some MSU fabric left over from a few years back when my mom made this little pillow case dress.


She's my cutie baby! :)

Well now she's 4 and I found the left over piece of fabric. It wasn't very much so I wasn't sure what I could do with it. But then I came across bandanas at JoAnns on clearance for $.99 and decided on this cheerleading/swing skirt for her.

These are super easy to make and all you need is two coordinating fabrics. I cut each piece 8 1/2" by 12". I cut 5 pieces of the main fabric and 6 of the bandana fabric. You can change your dimensions for whatever size you need.

Once I cut them I went ahead and roll hemmed the bottom of the fabric but didn't need to do it on the bandanas since they are already hemmed (yay). Then just stich them together like so:


Then you'll have one long strip. Lay it out and bring the seams of the main fabric to the middle of the bandana (or other fabric) and pin. Do this all the way around. It will look like this:


See how the bandana is the back piece.


At this point you just need to stitch across the waistband to keep everything together, turn it over about 1/2" and make your casing for the elastic, insert elastic and WHA-LA... you're done!! Super easy and super quick!!


It turned out exactly how I wanted! I have some left over bandana material and I am going to applique on a shirt "MSU". Will post pictures of that whenever it happens! :)

My first re-upholstery project

I'm not sure when I began this project (I'm thinking last February). Any way I got two of these reclining wingback chairs from my mom. She was getting new furniture and was going to give these beauties to Goodwill. Of course, there was no way I was going to let her do that!!! I wanted those - but definitely needed to be updated! :)


So I spent about $70 on fabric and several several months working on this. Seriously, I should have picked an easier project for my first one - like a stool or dining room chair!


The only bad thing is that I inherited two of these chairs so the other one is just still sitting in my house, waiting! And I'm not in the mood to do it! :( Maybe I'll find motivation - this winter! :)

This is my next upholstery project:

Whose on Pinterest???

One of my new addictions I have to admit! :) If you haven't gone over there - DO IT! It is amazing inspiration. Here are a few of my favorites from my boards right now...

This is my inspiration for a sofa that is sitting in my garage! Can't wait until I get the motivation to get it started!!

I'd love to make these for each of my kiddos.

This would be so easy and the kids would love it for movie night. A little adjustments and you could make them for nap mats!

Fun colorful tiles. Could be great coasters.

So there's just a few things that have caught my eye recently. What are you pinning?

Follow me on Pinterest so that I can follow you!! http://pinterest.com/lisa_lane/


http://pinterest.com/lisa_lane/

My first sewing "class"

I say "class" but it was just two of my friends at my store. I might could have fit one more person in the tiny room in the back but that would probably be about it. I had put a feeler out there on facebook to see if anyone was interested in making this dress:


So last night the girls brought their machines, fabric and notions and got to work. They did an amazing job! Here they are hard at work! :)


And look how AMAZING they turned out!!!!


They did such a fabulous job and got it done in about 2 hours which was great! And it was SO much fun! :)
Seriously, who wouldn't want to go to Paris??? :) I'm so in on this one!! Check it out...

http://ohhappyday.com/2011/06/goes-to-paris

But if you win, can you take me??? :)
Decorate Tutorials

Laurie over at Tip Junkie featured my faux drawers from my entertainment center! :)

So exciting and I LOVE her blog! She always links up the greatest projects and gives me so many ideas! :)

If you don't follow her - get over there and follow and see what I'm talking about!!!

Father's Day...

Well today's the day we do the traditional dozen doughnuts from Donut Palace (seriously the BEST doughnuts I've EVER, EVER had). But outside of that there's not much to buy for my hubby. See he's one of those wants big expensive things like a $200 golf club, which of course I cannot afford to buy. But of course, I always want to do something.

I found this on Pinterst via Bits of Everything and I thought it was the cutest thing and my hubby LOVES and I mean LOVES sweets so I thought it would be perfect. Packed up the kiddos yesterday and headed out to buy the supplies. Found everything but the Now and Laters (do they make these anymore)? We looked at 4 places - so I had to change it a bit but still turned out great.


My kids wanted to be the ones to make it so my 9 year old wrote all the words (notice how ours doesn't look nearly as pretty) and the middle child taped all the candy on. Little one just watched! :)


Aren't they cute?! :)

We gave it to their daddy this morning (with the doughnuts of course) and he really thought it was the cutest thing he's ever seen! *insert brownie points here for me*

I'm going to print a picture of it later today and frame it for him so he'll have it long after the candy is eaten.

Hope everyone else has a wonderful Father's Day!

Two milestones this week! :)

So I've hit two blogging milestones - both in the same week! :)

First, my entertainment center was featured at Monkey Momma's Crafts. How exciting! :) Do you remember the first time you were featured? Isn't it neat to see your work on someone else's blog? Thanks so much to Monkey Momma's Crafts for the shout out!

And, I also just hit 50 followers! :) I don't know if that is a milestone or not, it just seemed like a good even number to be excited about. Do you guys have milestone "numbers" that you get excited about? I guess the next one will be 100! Of course, it took me 3 months to get 50 so I guess it'll be a while...
Yep, I'm a curb picker. I can't seem to help myself. I see perfectly good furniture that just needs a little TLC and imagination! Here's an old shell of a dresser that was on the curb recently.
I knew immediately that it was the exact size I needed for an entertainment center. I have been looking forever for something to put in this space and organize this disaster!!!!

Ugh! Isn't it a mess!!!


I had a vision but needed a bit of help. Lucky for me, my brother came into town and he's the wood-working expert!
Notice the beer there on the top of the dresser. A working essential! :)


Here it is after a full day of work! You wouldn't think it would have taken a whole day to get that far but there was a lot of cleaning, measuring, cutting, sanding.... you get the idea!

Begin the second full day of work:


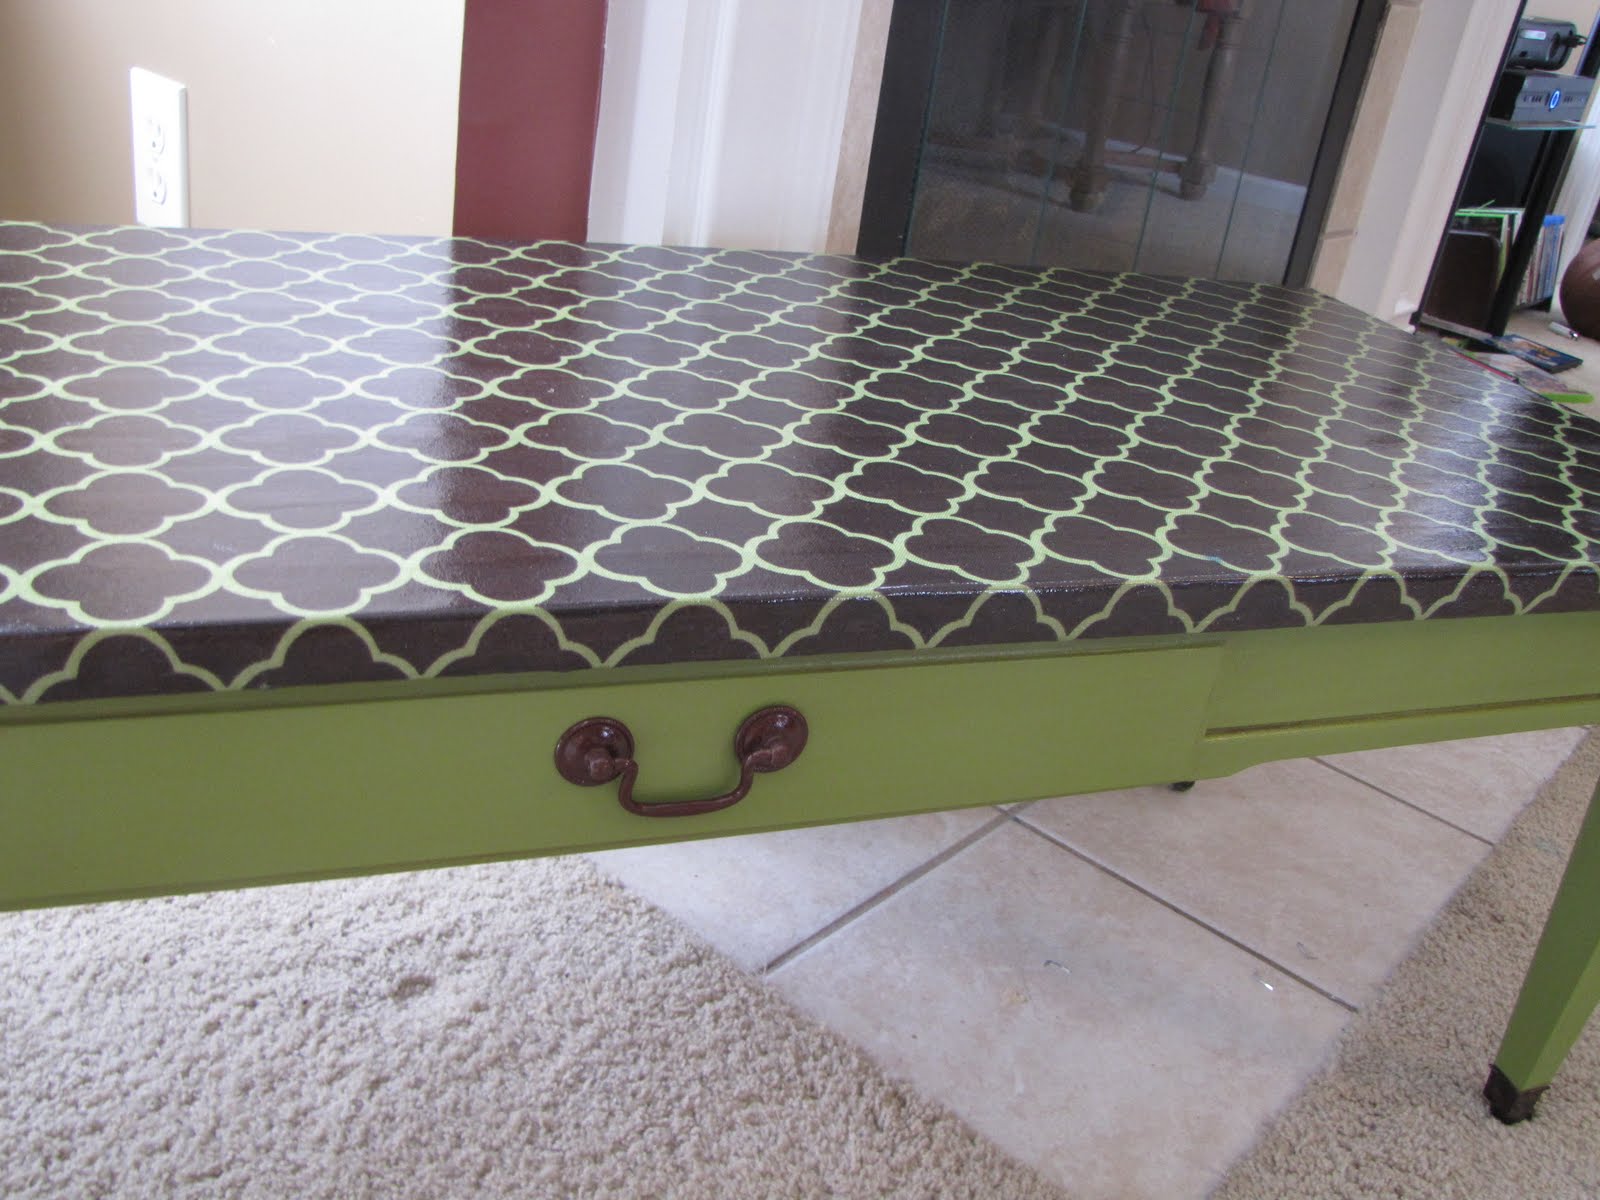
I'm not gonna lie, this one was some work. But I love the way it turned out. Here's some pictures! I just got it in my house so I don't have it completely fixed yet but couldn't wait! The components will go on the middle shelf but our cords aren't long enough so we'll have to get some new ones. And then I'll have the top of the "dresser" to decorate! :)


Found these storage boxes at Michaels after the fact and they ended up matching up PERFECTLY! It was meant to be! :)


The middle row will be for the components that are now stacked on the top. We found out when we moved this piece in and set it all up that our cords are too short. Easy fix, we just need to order longer ones and wait. UGH....

And see these cute little "drawers". These are photo boxes that I got at Michaels for $2 each, covered the fronts with scrapbook paper and screwed a draw pull on... wha-la - insta drawers for our mess of dvds and games.


I'm sure once everything is "fixed", done and decorated I'll be posting some more pictures but had to share one of my favorites!!! :)

My coffee table redo...

I feel like it's been forever coming but in reality it hasn't been that long! I think it's just that this project took so long in terms of drying time it took me over a week. Here's the table I bought off CL. I loved it and she was also selling an old sewing cabinet so I was a sucker for the sale. It only cost me $10 and look at all that personality! :)


So I painted it and covered the top with fabric. The time consuming part came when I had to put several coats of polycrylic over the top of the fabric. I even lined the drawer with coordinating fabric (although I don't have a picture of that).

Here she is in all her leggy glory!